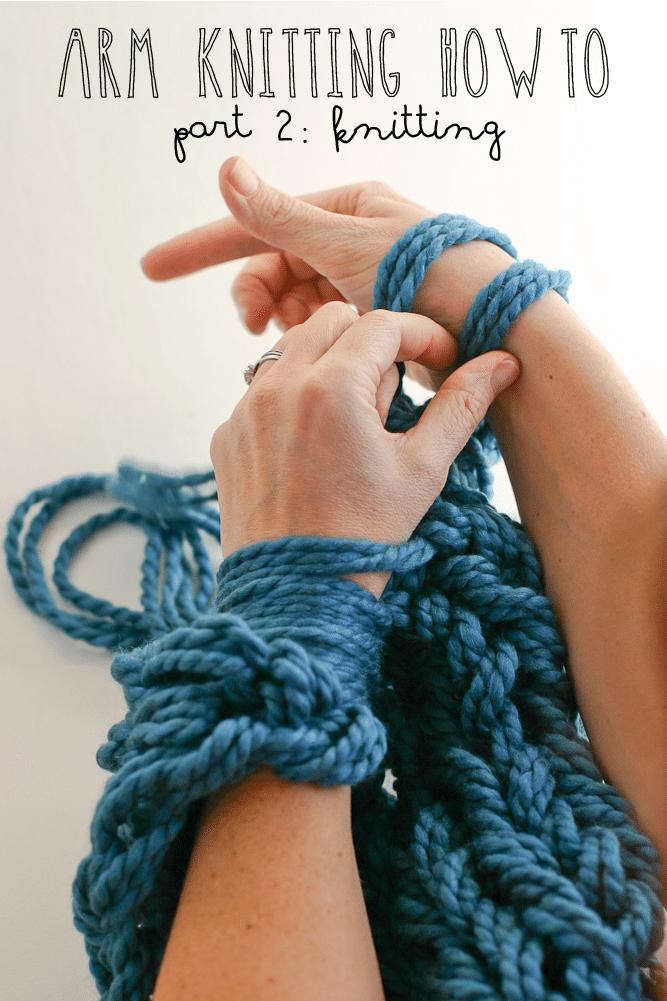
Arm Knitting How-To Photo Tutorial // Part 2: Knitting
You’ve reached Part 2: Knitting of a four part arm knitting tutorial.
If you are just beginning your arm knitting adventure, start at:
Part 1: Casting On Arm Knitting.
Or, you may be ready for these parts:
Part 3: Binding Off Arm Knitting
Part 4: Finishing Arm Knitting
If you want to have a portable copy, you can purchase the instant download PDF of complete instructions here. Or, if you are interested in buying a kit of luxurious 100% wool yarn with the directions, go here.
In arm knitting, you knit all the stitches from your right arm onto your left, and then from your left arm back to your right. Each time you move the stitches from one arm to another, knitting as you go, you make a new row.
Let’s dive in:
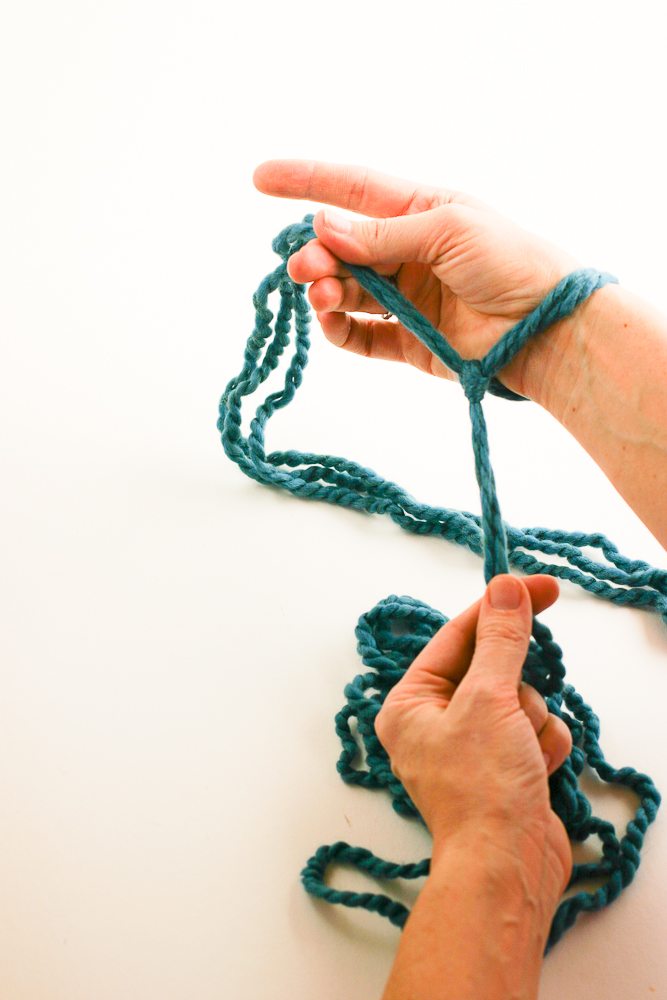
You need to have cast on stitches on to your right arm. See here for how. Then, you start with Row 1, 1st stitch.
Row 1, 1st stitch:
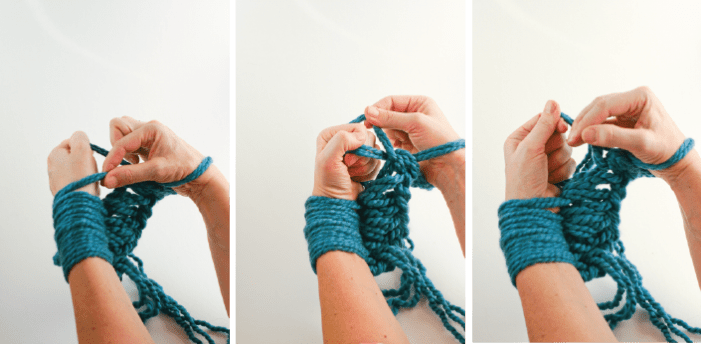
// Pick up the working yarn (remember the working yarn goes to your skeins of yarn) and place it over your thumb on your right hand. (You won’t be using the tail, or cut end, any more.)
// Close your fist over the working yarn.
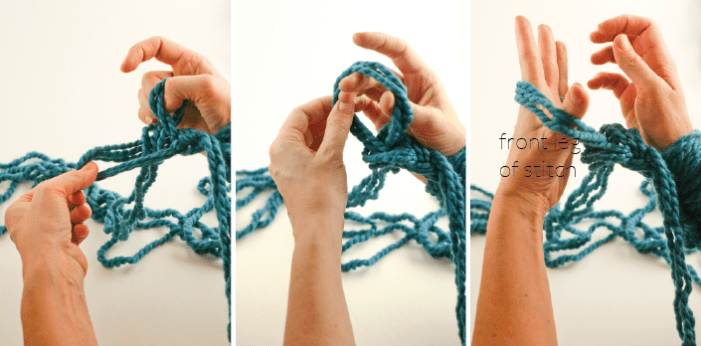
// Holding on to the working yarn in your fist, pull the first stitch from your right arm over your fist.
// You are effectively pulling the working yarn through the old stitch to make a new stitch to place on your left arm.
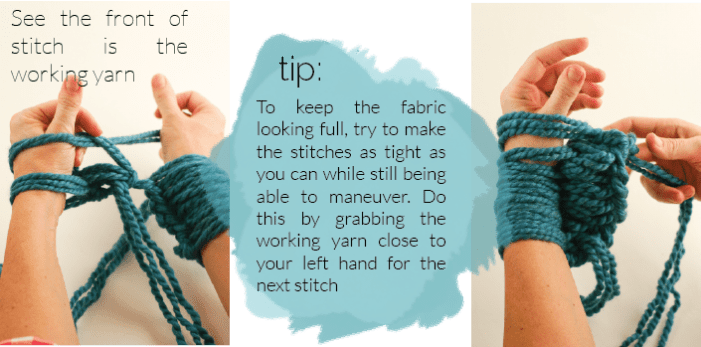
// After the old stitch is over your fist, drop it. Take the new stitch in your right fist, turn the loop a 1/2 turn and place it on your left hand/arm.
// You want the part of the loop that is in front of your hand (this is called the front leg of the stitch) to be the part that goes to the working yarn.
Row 1, 2nd stitch: this stitch is no different, but sometimes it helps to see it 2x.
// Repeat stitch process until you get to the end of the row, as in the far right photo above.
Row 2, from the left arm to the right:
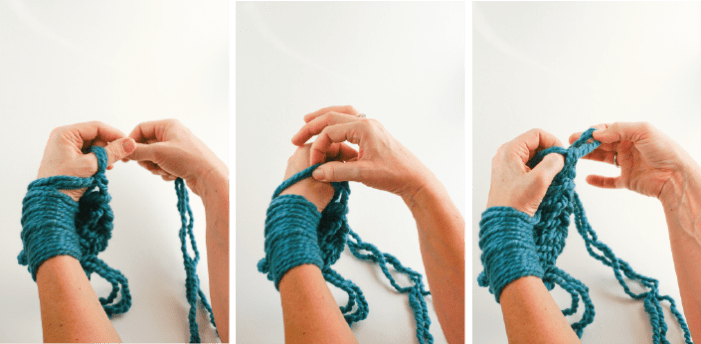
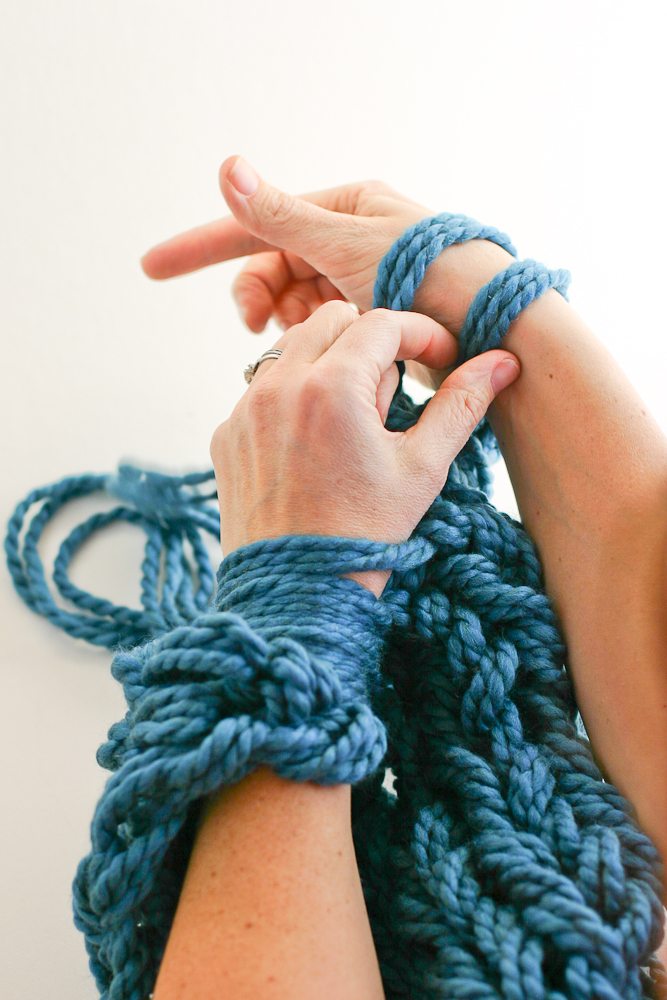
Once all the stitches are on your left arm, working on row 2 is no different than row 1, you are just knitting in the other direction, from your left arm to your right.
// Place working yarn over thumb on left hand, close your fist.
// With right hand, pull first stitch from left arm up and over left fist.
// Drop the stitch in your right hand, keeping hold of the loop in your left hand.
// Put loop on right hand.
// You’re ready for the next stitch.
// Repeat the stitch process until you get to the end of the row.
// Continue knitting from your right arm to your left, and then from your left arm to your right, until you get to desired length.
// End with all of the stitches on your left arm. Make sure you leave enough yarn (at least 4 yards for the cowl) to bind off and complete any necessary seaming.

Yay!! Congratulations. You’re thorough the bulk of it, literally! You’re almost to this cowl below! Next,
Part 3: Binding Off
Part 4: Finishing
Just imagine the lovely cozy warmth of this as you trot around town! Okay, usually I schlump and schlep around town, but you know what I mean! It’s like a soft, fluffy hug all day long!








Leave a comment
This site is protected by hCaptcha and the hCaptcha Privacy Policy and Terms of Service apply.