Book Binding Tutorial with Embroidered Cover
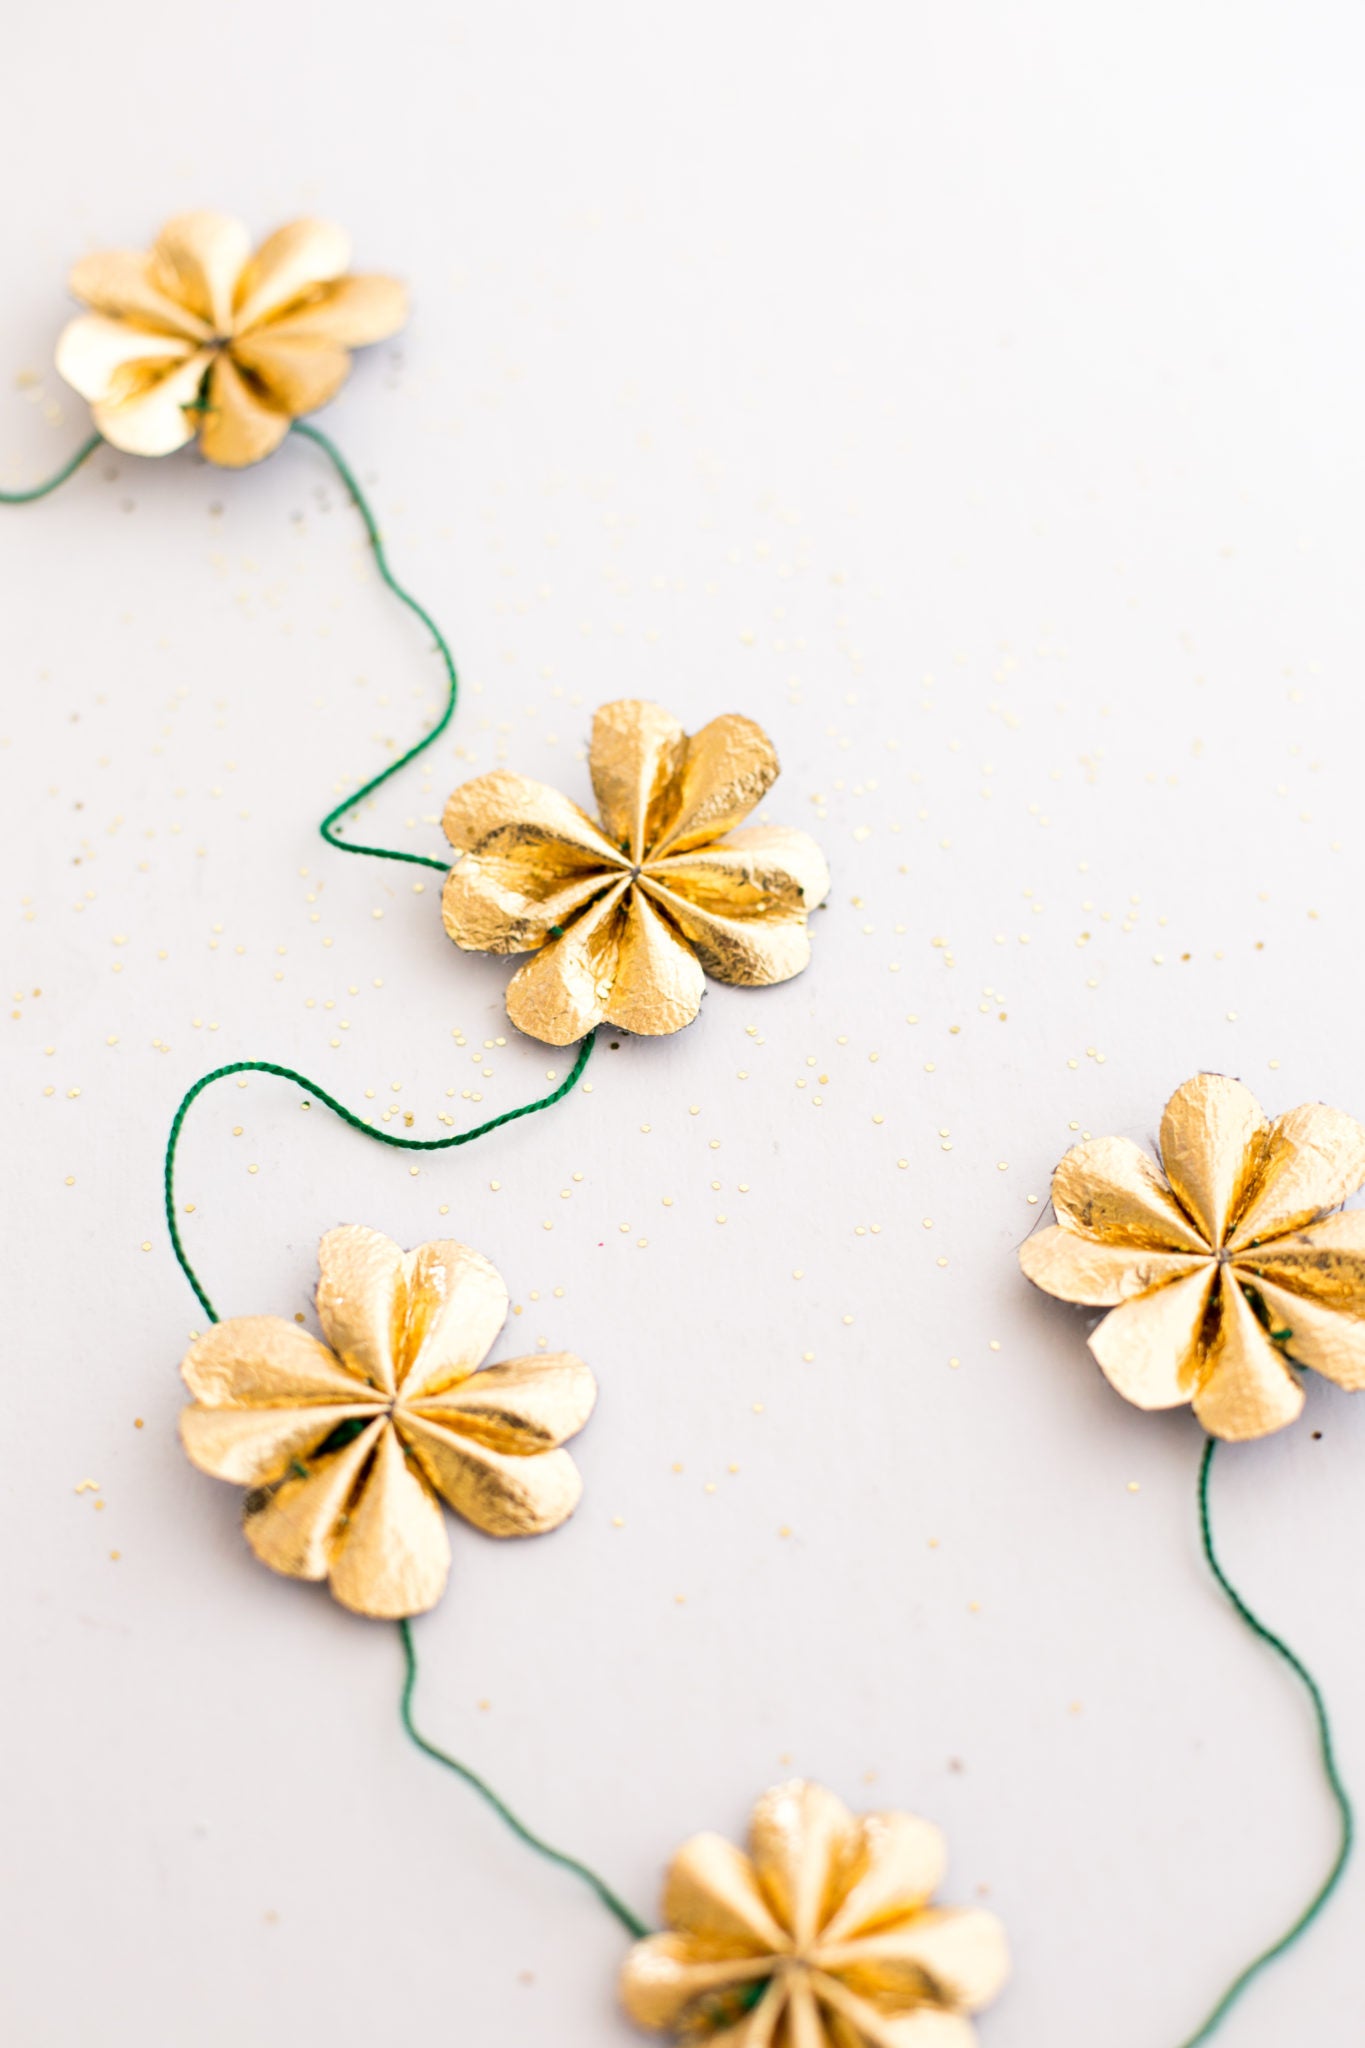
I love embroidering into paper. It is simple, yet it transforms a plain piece of paperboard into something strikingly lovely. Apparently, I got bitten by a gold four-leaf clover bug this year. Did you see this gold garland from earlier this week? I began these little books with a hand drawn design, which I filled in with paint and stitches as detailed below. I finished them off with a Japanese Hemp Stitch book binding. Don’t let the number of steps in the tutorial fool you. It is easier than it looks and it just so pretty!
I love the gold thread in the Japanese binding and then outlining the gold of the four leaf clovers. It makes them seem that much more special. Won’t these make a sweet St. Patrick’s day gift? I guess I decided to go all Irish-Japanese fusion on this project! Nothing like a little multi-culturalism, right?
I find the design of the binding simply charming against the paperboard. Imagine this book, too, with whatever embroidery you choose–an initial, a favorite animal, a geometric design. Or, leave the embroidery off altogether and simply highlight the binding.
This post was written as part of the #12MonthsofMartha program. I’m excited to be participating again this year, joining a team of very talented bloggers across the country. Each month I will post a project using materials from Martha Stewart Crafts. So many lovely things to explore.
Japanese Hemp Stitch Binding Tutorial with Hand Embroidered Cover

Materials
Paperboard (can use upcycled cereal or cracker box)
Pencil
MS Paper Trimmer
MS Crafts Metallic Craft Paint in Gold
Needle
DMC Embroidery Thread
MS Crafts Doily Lace Gold Thread
Scissors (like mine)
MS Glitter Sheets
Rubber cement
White paper (white cotton rag paper would be especially nice)
Awl (I used a crafts weeder I had on hand which worked fine)
Ruler
// Use paper trimmer to cut front cover and back cover to desired size from paperboard (mine are 3 1/4 ” x 4 1/2")
–Draw design on the front cover. A four leaf clover is basically four soft-topped hearts with their bottoms oriented around a center point. The stem comes from between the leaves. Use an image online as a guide.
–Fill in design with gold paint. Paint each leaf separately to give each one distinction from the other (like coloring four different pieces as opposed to the clover as a whole). Let dry. Add a swipe of gold paint down the center of each leaf giving it a spine. Let dry again and erase pencil markings in drawings.
// Embroider design by poking stitch holes around shapes or along letter lines approximately 1/16" apart. Stitch around shapes or along letter lines using the back stitch. Weave in and trim all ends.
// Cut inside covers from the gold glitter paper to same size as the outer paper board covers. Cut inside filler paper 1/8" shorter than covers in both directions (3 1/8" x 4 3/8").
//Glue glitter inside covers to back of outside paperboard covers, matching edges exactly.
Now, you should have all the pieces for your book. For the binding, first take a deep breath and watch this gif through once. It is a lot less complicated than it looks. I’ve written out each step separately below it. Don’t be overwhelmed by the number of steps. I wrote out each and every little step so that it is clear.
Here are the steps written out one by one:
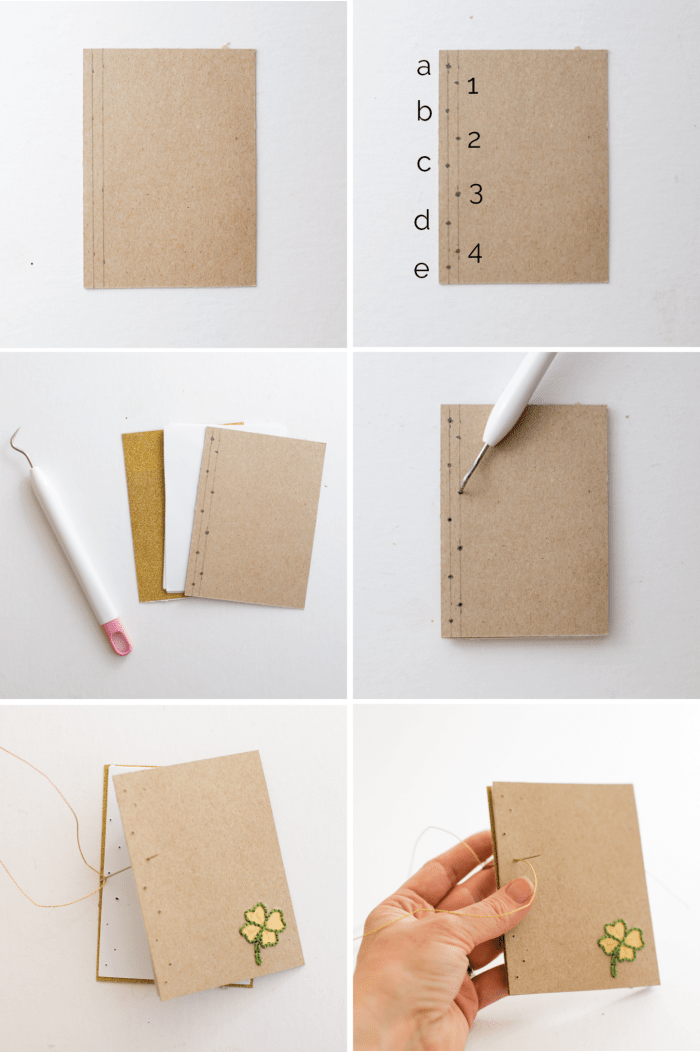
//On the back cover, mark two lines, one 3/16" from the edge and one 3/8" from the edge.
//Mark four hole spots with a pencil along the 3/8" line. The two outer spots should begin 5/8" from the top and bottom of the book. Evenly space the other two hole marks in between the first two marks. Along the 3/16" line, mark hole spots exactly in between each of the four hole dots on the 3/8" line. The outer most dots on the 3/16" line should be in between the edge of the book and the outer most dots on the 3/8" line.
//Stack the book contents together, front cover, inside pages and back cover.
//Using awl, poke holes through all layers in spots as indicated.
//Separate stack in half and bring needle and thread through center of book and through hole 2 (see labeled guide above). Leave a four inch tail, bringing it to the center of the book.
//Bring your needle and thread around the outside of the book and back through 2 from back to front. Your first stitch should be anchored.
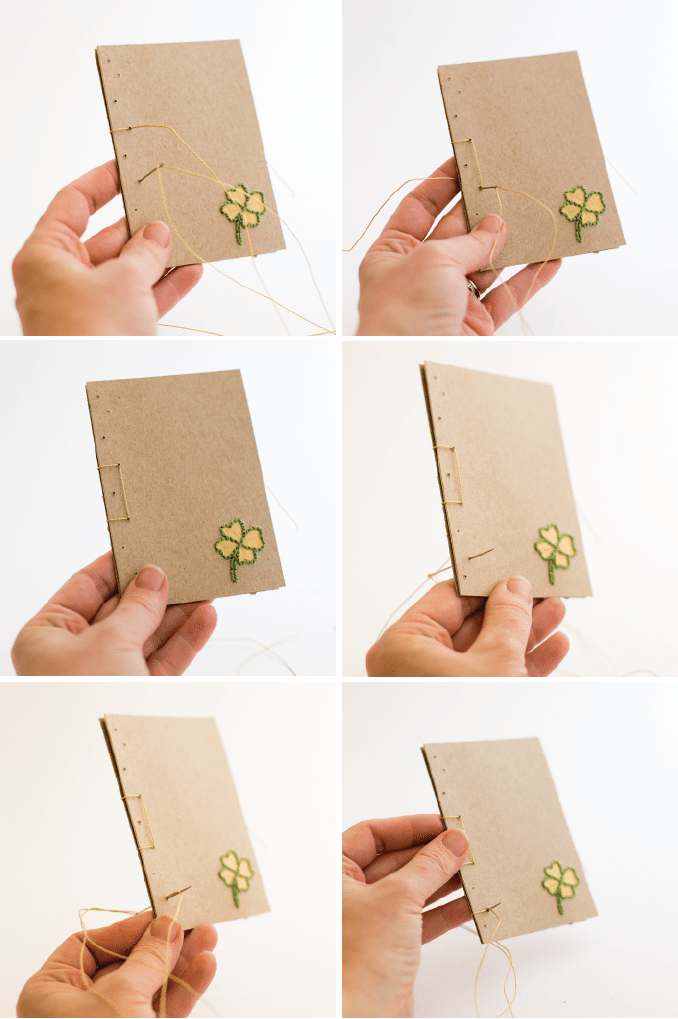
//Bring thread from front to back through 3.
//Bring needle and thread around the outside of the book and through 3 again from front to back.
//See how the ones that go around bind the outside of the book.
//Go through 4 from back to front.
//Go around the side of the book, bringing needle through 4 again from back to front.
//Go around the bottom of the book, bringing needle through 4 again from back to front.
//Go through E from front to back.
//Go around side of book and through E from front to back.
//Go around bottom of book and through E from front to back.
//Come up through 4 from back to front.
//Go through D from front to back.
//Go around side of book, through D from front to back.
//Bring needle from back to front through 4 again.
//Go from front to back through 3.
//Bring needle from back to front through D.
//Go through 3 from front to back.
//Bring needle from back to front through C.
//Go around the side of the book bringing needle through C from back to front.
//Go from front to back through 3.
//Come from back to front through 2.
//Go from front to back through C.
//Bring needle from back to front through 2.
//Go from front to back through 1.
//Go around the side of the book, bringing needle through 1 again from front to back.
//Go around the top of the book, bringing needle through 1 again from front to back.
//Bring needle through A from back to front.
//Go around the side of the book, bringing needle through A from back to front again.
//Go around the top of the book, bringing needle through A from back to front.
//Bring needle down through 1 from front to back.
//Bring needle up through B from back to front.
//Go around side of book, bringing needle through B from back to front.
//Bring needle from front to back through 2.
//Bring needle through B from back to front.
//Bring needle from front to back through 1.
//Bring needle up through 2 from the back and exiting through the middle of the book where you started. Trim ends with 1/2" length.
//Tie a knot tightly in the center of the book and tuck ends into the binding.


Leave a comment
This site is protected by hCaptcha and the hCaptcha Privacy Policy and Terms of Service apply.