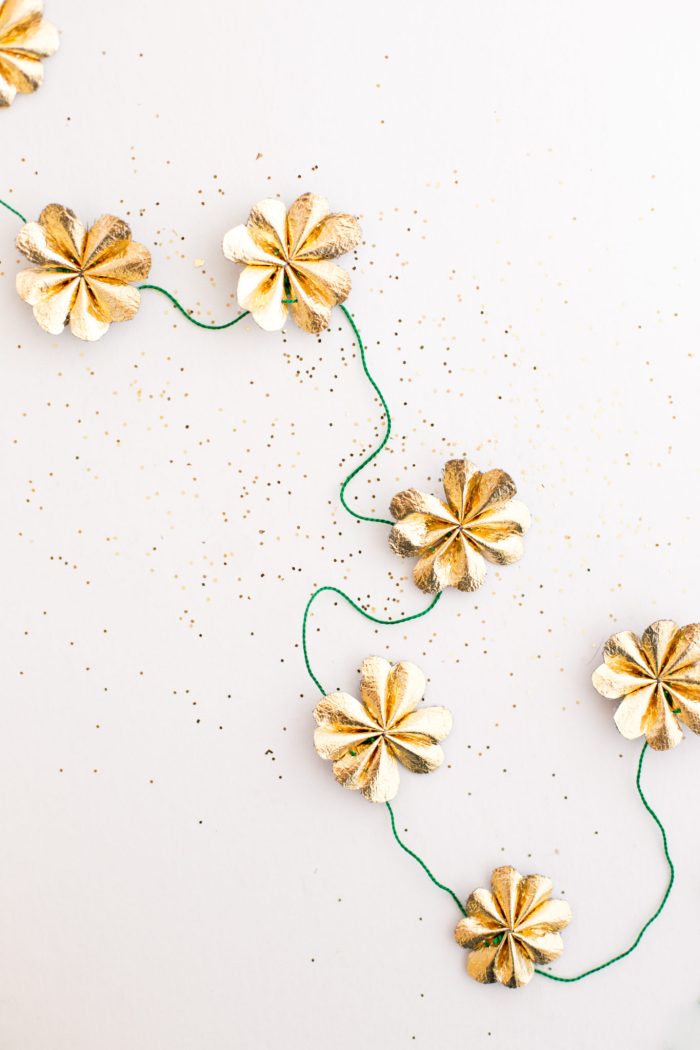
Gold Leather Four Leaf Clover Garland DIY
This little idea of a gold four leaf clover garland came to me in a whirl, just in time for St. Patrick’s Day. I was so excited to make it happen. I love four leaf clovers! Anything that gives you luck or the promise of a really good day seems a beautiful thing to me. That four leaf clovers only come to those that work hard to find them suits me just fine!
Nobody was happier about this four leaf clover garland idea than my Baillie boy, who, according to him, hasn’t been featured on my blog since our Boulder days. What?! That was 2 and a half years ago. Well, I saw him in these glasses and I couldn’t resist. We had to remove Allie from the shoot though, tensions were high! I think Baillie makes a charming model and he has no idea what I have in store for him.
This St Patrick’s Day garland is perfect for a little happy snail mail surprise. I’m sending these little beauts to an Irish friend that I think will adore them. The envelope will have only a *little* bit of sparkle confetti! Or, how marvelous would this garland be over a party table? Try multiple strands for a fab photo backdrop. Even better, hang them over your desk to give you that golden luck you all deserve all day long.
The four leaf clover garland is super easy to make, only a an hour or two start to finish, and just so satisfying in its glowing happiness.
Baillie asked me if I thought he looked girly. I told him no way, just swoon-worthy. Go ahead and give him some love below and spread that beautiful face around the cyber-sphere! Happy St. Patty’s!
DIY Gold Leather Four Leaf Clover Garland
Materials
Gold Foil Pleather (you can also find this at Joann’s)
Needle
Sharp scissors (these are my ABSOLUTE favorites)
DMC embroidery thread, color 895
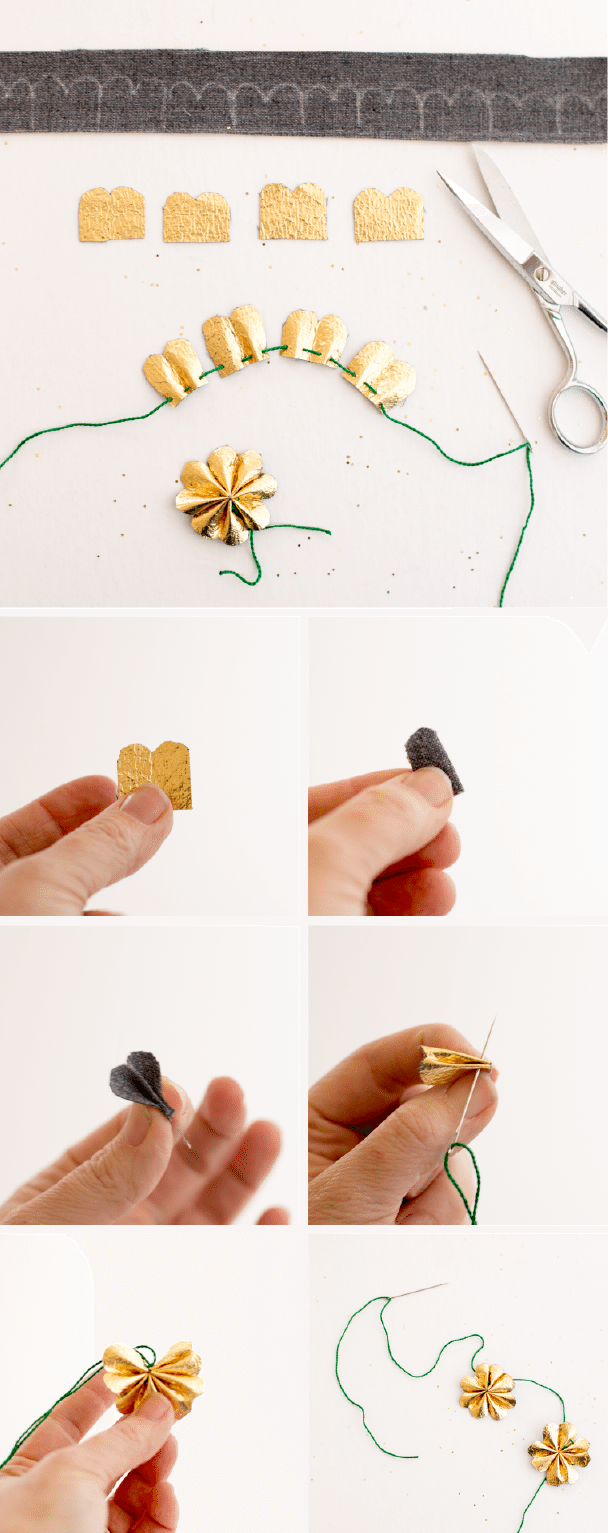
:: Draw a straight line on the back of the pleather. Add 1/2" lines perpendicular to that line at 1" intervals. Add equal humps along the top, two humps for each 1" interval. Each 1" interval represents one leaf. They don’t need to be matching, irregularity will add to their charm. Cut out each piece at the 1" mark. However many clovers you want on your garland, multiply that number times four to figure out how many leaves you need to cut. This top photo shows the process over all. Below, I’ve shown how to fold each leaf to achieve the clover if you need more detail.
:: Take an individual leaf.
:: Fold it in half, right sides together.
:: Fold both ends back towards the middle, matching up with the original fold.
:: Run a needle and thread through all layers about 1/8" to 1/4" up from the bottom.
:: Repeat for four individual leaves. Cut thread and tie a knot, bringing the ends of the leaves together in a circle. Adjust leaves.
:: String each clover on to a long piece of thread, bringing the needle through the top of the clover to keep the clovers hanging down.
:: Trim all clover threads and hang!
May the luck of the Irish be with you!







Leave a comment
This site is protected by hCaptcha and the hCaptcha Privacy Policy and Terms of Service apply.