Floral Embroidery Patterns for Dishtowels
With the summer heat, I tend to put away my knitting in exchange for lighter and more transportable crafts. These simple floral embroidery patterns pair my making urge with the demands of the summer heat and travel. I love having a simple embroidery project at hand for lazy afternoons with a lemonade or extended car rides to the mountains.

I enjoy my respites with needle and thread so much. Every year, I seem to forget how soothing hand embroidery is until I pick it up again. I find stitching all the more relaxing, too, when the motif is a lovely summer floral one. Doing needlework on simple tea towels provides a wonderful stash of hostess or birthday gifts as the summer progresses, as well.
Evening summer walks or early morning runs inspire my floral embroidery patterns. The gardens I pass wave gently in the breeze, laden with their blooms full of color and delight. I pull out my phone and snap a few shots for later. Once home, I transcribe these inspiring photos into simplified drawings in colored pencil.
I match embroidery floss to my inspiration, often mixing colors to obtain the variation you see in nature. The final project rarely turns out exactly as drawn, but I find it helpful to have a starting place.
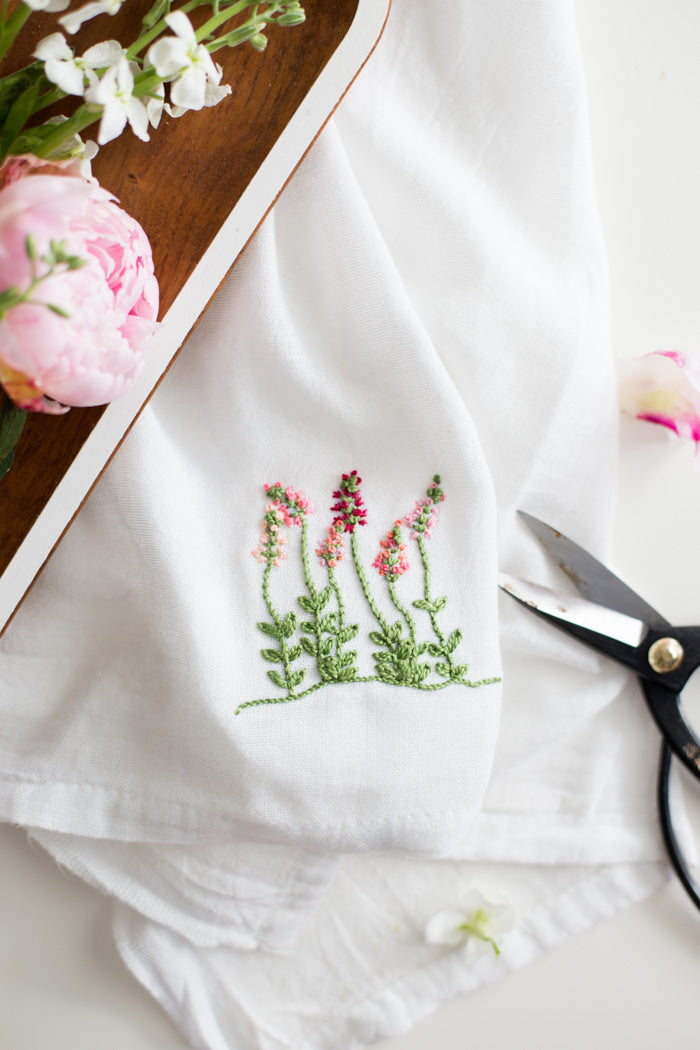
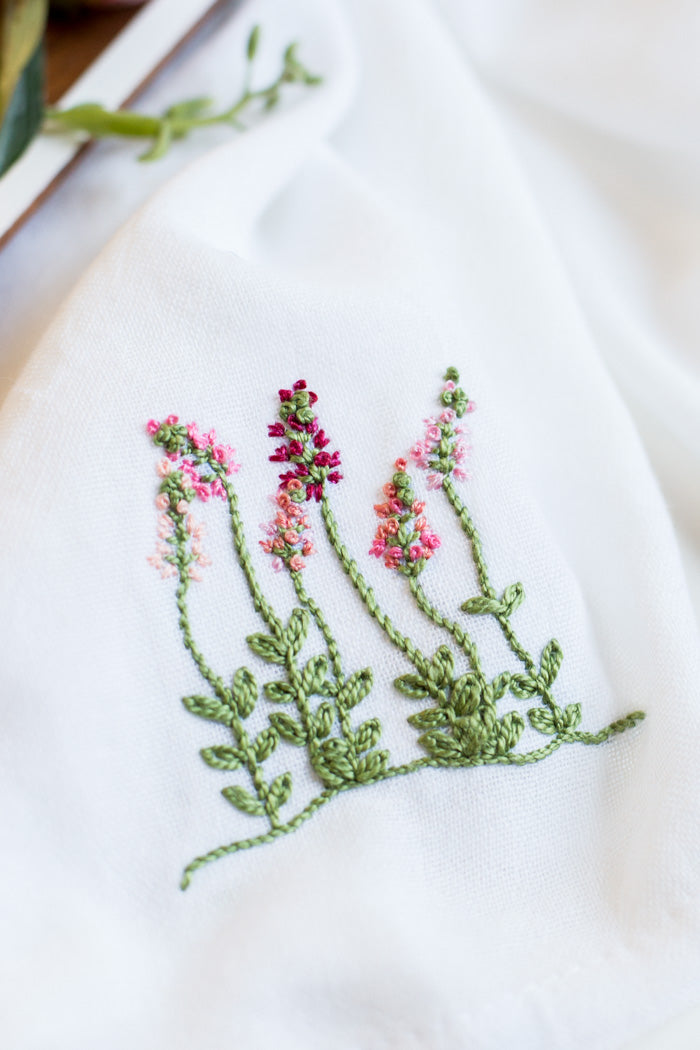
I have two patterns to share with you today in PDF format, both these lovely snapdragons and the beautiful globe-like allium below.
Floral Embroidery Patterns For Tea Towel How To
Materials
Floral Embroidery Patterns PDF
Various Embroidery Thread (DMC 5 for stems, DMC 25 for flowers)
Mid-weight Fusible Craft Interfacing
Embroidery Tracing Paper (erasable with damp cloth)
Flour Sack Kitchen Towels
Embroidery Hoop
Embroidery Needle
Scissors
:: Create fun floral embroidery patterns on your own by sketching simplified versions of your favorite blooms. Next, pair them with embroidery floss in appropriate colors. I have created a Floral Embroidery Patterns PDF for you to print to recreate the towels I’ve made.
:: First, cut mid-weight fusible interfacing about the size of the pattern you want to stitch, leaving extra an extra 1-2 inches all the way around. Next, apply the fusible interfacing to the wrong side of the tea towel according to the manufacturer’s directions.
:: Place tracing paper (blue side down) on the towel first. Next, place the PDF pattern on top of the paper. Finally, center both layers on the tea towel where you want the design. The design should be in the middle of the towel, about three inches up from the bottom. Now, trace over the design provided with a ballpoint pen.
:: In order to keep your fabric taut for easy stitching, place an embroidery hoop over the carbon traced design. The fusible interfacing should be on the reverse side stabilizing the fabric embroidery.

:: To create the stems and ground, make a Stem Stitch along the drawn lines. To make the leaves, use a Lazy Daisy Stitch (I fill in my daisy stitch with a straight stitch, sometimes of an alternate color for highlights).
:: For the blooms of the Allium, use French Knots.
:: To create the buds and blossoms of the snap dragons, use a mixture of French Knots for the buds, and three straight stitches that are short, long and short, to create the open blossoms.
:: Once you have completed your stitching, trim the embroidery thread ends. Next, peel and cut away extra fusible interfacing not needed, leaving 1/8 ” around all stitching. Iron the towel. Now your embroidered tea towel is ready to gift or place in your own home for everyone to ooh and ahh at!
Happy Summer stitching!

This post was created for MarthaStewart.com by Anne Weil of Flax & Twine as a Contributor, and published there on June 30, 2016. Have fun exploring my profile and work there.


Leave a comment
This site is protected by hCaptcha and the hCaptcha Privacy Policy and Terms of Service apply.