Reverse Embroidery Hoop Monogram DIY–a finish fifty project
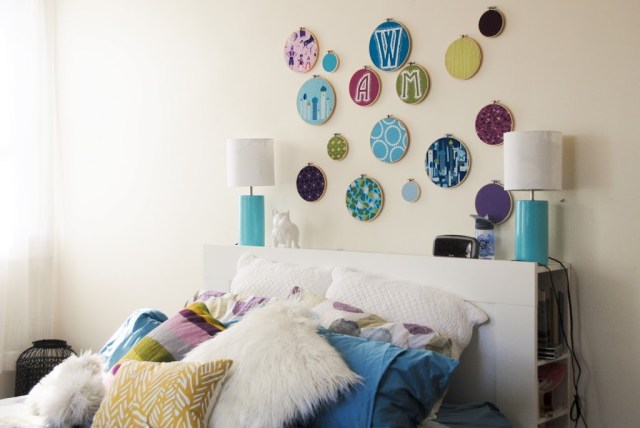
Don’t let the complex look of this project fool you–truly, it is super simple. You need to know the back stitch for the letter outline, and really, that’s it. The rest of it is just random stitches. I think this project would make a great kids’ craft as it doesn’t really matter how the rest of the stitches are done. In some ways, the messier the stitches, the better.
A HUGE thanks to Lizzy House, whose beautiful fabric adorns almost every single hoop. These fabrics cover three or four of her collections, too. She’s so good at making it all work together! Can you tell the new colors in Allie’s room? bye-bye, pink–*sniff*
I will show you the before and after of her room soon. So excited to tell you that it is a feature in the upcoming Discovery Girls magazine. If you want to see it sooner, go get the June/July issue in stores any day now!
Oh, and you know this project coming off of that finish fifty list, big time!
Here are the DIY instructions for the Reverse Embroidery Hoop Monogram:
Materials:
Embroidery hoop(s) (I used an 8" one for the last name initial and 6" hoops for the first and middle initial)
Embroidery floss (in desired color, I used 8 or so skeins for the three letters!)
Embroidery needle
Scissors
Craft glue
Computer/Printer
Water soluble marking pen (or chalk pen)
Print out desired initial such that it will fit on hoop with 1/2 an inch to spare around all lines. Tape monogram onto bright window, with fabric on top. Transfer initial to fabric with a air-soluble fabric marker.
Using back stitch, trace the outline of the letter. Then, use random stitches for about 1/2" outside the outline of the letter to create a border of stitches.

Layer and overlap the random stitches as you go. Add outlier stitches further spaced out towards the outside edges of the border. 

You’re ready to hang! Repeat for all desired letters. To make a whole display, simply use other coordinated fabrics in hoops of various sizes. I have a post for you with hints on how to hang the collection. Coming right up!
Happy stitching! xo, anne


Leave a comment
This site is protected by hCaptcha and the hCaptcha Privacy Policy and Terms of Service apply.