A Yellow Jeweled Bracelet - a year of handmade gift
I actually made a matching one for myself and am wearing it right now with a thick gold chain bracelet. Very fun. As always, these little bracelets are easy to make. You can get everything at your local craft store–no jewelry “fixings” required. I found the trim in the JoAnn Fabrics ribbon/trim section.
This gift for Allie is part of my commitment to give only handmade gifts this year. There will be lots of ideas throughout the year for all kinds of folks. My brother is coming up next so keep your eyes peeled for a good handmade “man” gift. For other great gift ideas, please view the a year of handmade gallery by clicking the button below.
I do this in a square to make a stable and sturdy end of the bracelet for the “clasp.”
Fold a piece of elastic cord to form a loop large enough to go over your chosen button, but not so big it will slip off.
Sew the elastic to the ribbon that has been doubled over, making sure you come up through the elastic at least a few times to secure it to the ribbon.
Whip stitch around the elastic to provide a nice cover over the elastic, then trim excess length of elastic and threads. This is the under-side of the bracelet.
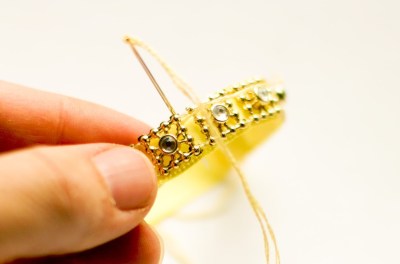
Cut your trim to desired length, keeping in mind that you’ll be turning over 1/2" of the ribbon at the end for the button. I like these ribbon bracelets fairly snug around the wearer’s wrist. Align trim flush against the end of the ribbon with the elastic attached. Sew trim to ribbon.
Continue to tack trim to ribbon, securing both sides of the trim and allowing the bracelet to bend as you sew. I did one side first and then came back along the other.
When your trim is fully secured, remeasure around wearer’s wrist. Hem 1/2" of the ribbon (as above) to provide a secure place to attach the button.
Finis!! It’s that easy.


Leave a comment
This site is protected by hCaptcha and the hCaptcha Privacy Policy and Terms of Service apply.