


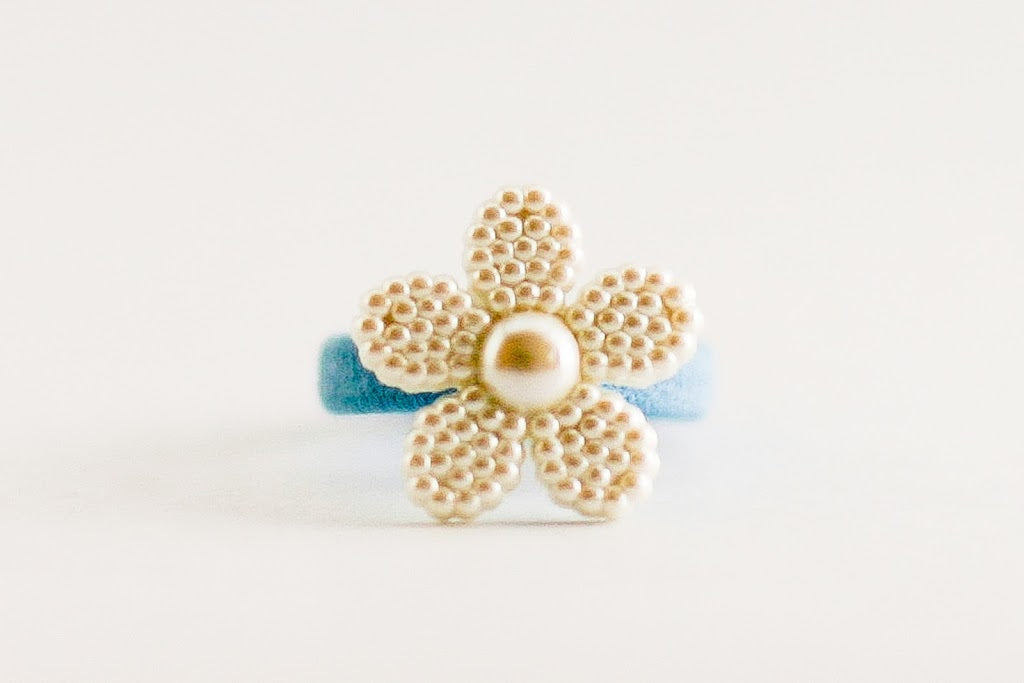
Day 6: A Pearl Cuff - a diy pearl and felt bracelet


Materials:

Cut a half inch strip of felt. The length of a typical piece of wool felt is 12". This is usually long enough to go around most childrens’ wrists. If I add a longer closure that length works for me as well – but barely.


Start by securing your embroidery floss


Following that pattern of bottom strand, top strand, consistently will make the back nice to look at too.

Sew your stitch in the middle of the connecting strand so it has room to shift with out bunching.


Remove a bead to make room for button. Here is where you want to shorten the bracelet if your child’s wrist is smaller. You may want to leave a tab of felt extended beyond the button so that when it closes the bracelet ends overlap. This would also allow for expanding the bracelet as the kiddo gets bigger (good!). I wanted this one to be larger (can you guess why?, greedy, little me), so I used as much of the felt as I could for length. My daughter required 11" from button to the end of the other side before the elastic loop began. It measured about 11 1/2" with the elastic.

Sew button to felt securely.

Cut a two-inch piece of shoe-string elastic and make a loop with it.

Attach this to the other end of the felt strip.

Sew elastic to bracelet, carefully stitching underneath the last pearl. This will hide your stitches from the front of the bracelet

This is how the back should look. You should do some looping (whip stitch) around both ends, but also make sure you go through the elastic a few times so it is securely in place.

Trim the elastic bits.


Finis! Yes, I do love it so.

Tomorrow is a fun little necklace that involves a cool, but easy ruffling technique.
Leave a comment
This site is protected by hCaptcha and the hCaptcha Privacy Policy and Terms of Service apply.